
Orchid Care
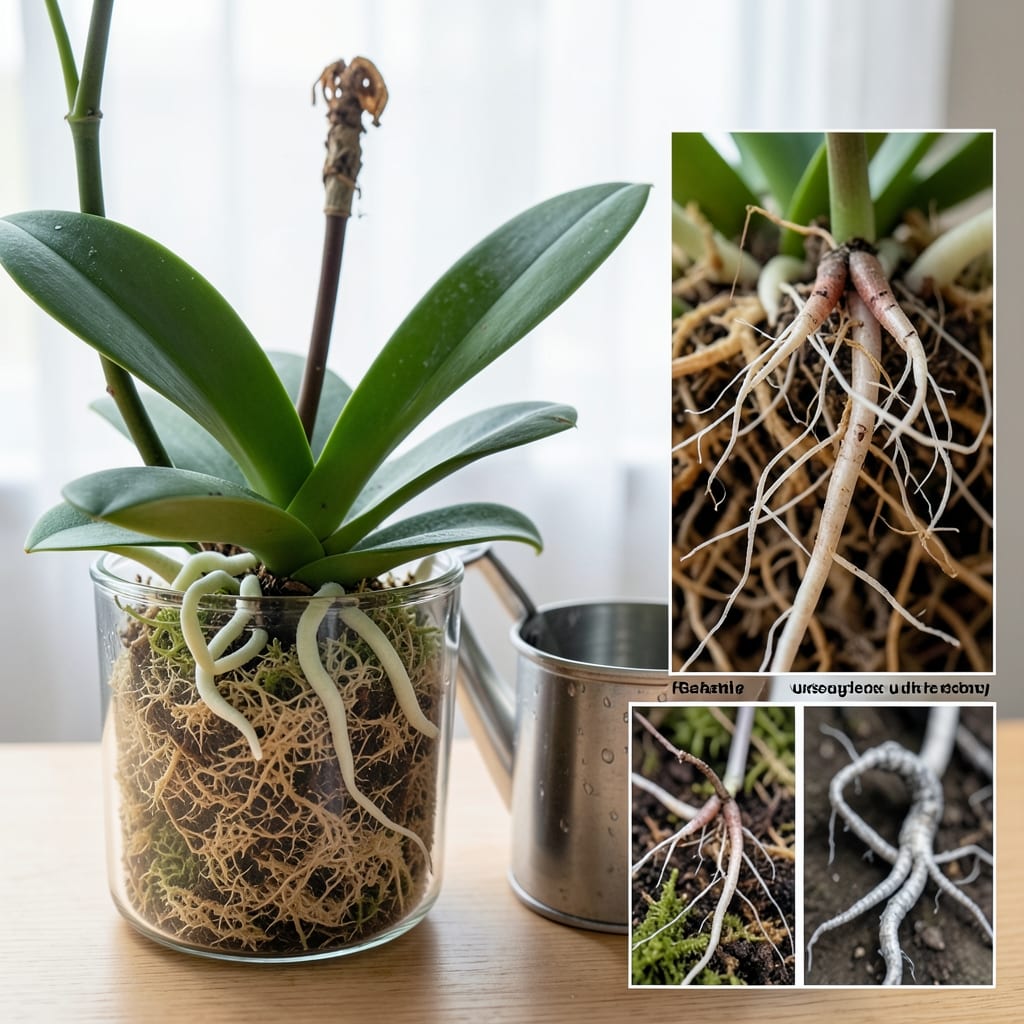
Knowing how long for orchid to grow new roots can feel like waiting for a snail race—unless you understand the hidden triggers that speed up the process. Your 🌸 orchid might take just 4-6 weeks for new roots to sprout, but some varieties (like Cattleyas) can take twice as long if conditions aren’t perfect.
The key to faster root growth isn’t just patience—it’s creating the right environment. Too much humidity? Roots rot before they even start. Not enough light? They’ll stay dormant like a hibernating bear. I’ll show you exactly how to adjust care routines to coax those roots out in record time, without guessing.
Most growers make one critical mistake: they repot too soon or water on a rigid schedule. Orchids thrive on inconsistency—dry spells followed by deep soaks. I’ll break down the species-specific timelines and the subtle cues (like root color shifts) that tell you your orchid is finally waking up.
Ready to transform your orchid from a sad stem to a root-powered powerhouse? Let’s dive into the science-backed steps that actually work—no magic potions required.


Orchid root regrowth timeline by species: how long until you see progress?
Orchids don’t grow roots on a one-size-fits-all schedule—your Phalaenopsis (moth orchid) might sprout new roots in just 4-6 weeks, while a Cattleya could take 8-12 weeks to show signs of regrowth. The difference? Genetics, care habits, and environmental triggers. Understanding your orchid’s species-specific timeline lets you set realistic expectations and adjust care routines before frustration sets in.
New roots start as tiny, silvery-white root tips that emerge from the rhizome (the thickened stem base). Over 2-4 weeks, these tips grow into firm, green roots—if conditions are ideal. But here’s the catch: color changes are your best progress indicator. Healthy roots shift from white to green as they develop chlorophyll, while stalled roots stay pale or turn brown. I’ll show you how to track these shifts without damaging delicate new growth.
Most growers overlook the dormancy phase after repotting or pruning. During this time (typically 2-3 weeks), your orchid conserves energy, making root growth seem slower than it actually is. Patience here is key—rushing water or fertilizer can backfire. Let’s break down what to expect for the top 3 orchid types and how to accelerate their natural timelines.
| Orchid Type | Root Regrowth Timeline | Visual Progress Cues | Care Accelerators |
|---|---|---|---|
| Phalaenopsis | 4-6 weeks | White tips → green roots in 3-4 weeks | High humidity (60-70%) + weekly misting |
| Cattleya | 8-12 weeks | Slow start; roots thicken after 6 weeks | Bright light (3,000-5,000 fc) + dry spells |
| Dendrobium | 6-10 weeks | Roots appear after buds form | Cool nights (55-60°F) + bark substrate |
| Oncidium | 5-7 weeks | Fast but needs warm temps (70-80°F) | Frequent light watering (every 3-4 days) |
Phalaenopsis orchids are the fastest growers because they evolved in humid, tropical conditions where moisture is abundant. Their roots can appear in as little as 3 weeks if you maintain 60-70% humidity and avoid letting the roots dry out completely. The trick? Use a clear plastic bag over the pot (with ventilation holes) to trap moisture—just remove it after watering to prevent rot.
Cattleyas, on the other hand, thrive on dry-wet cycles. Their roots take longer to regrow because they’re adapted to seasonal droughts. Water your Cattleya only when the potting mix is completely dry—this mimics their natural habitat and triggers faster root thickening. Pro tip: Use a moisture meter to avoid guesswork, especially if your home has low humidity.
Dendrobium orchids follow a bud-then-root pattern—new roots won’t appear until after the plant sets buds. If you’re growing Dendrobiums, focus on cool night temperatures (55-60°F) to simulate their high-altitude origins. Place the pot near a window with morning sun and move it indoors by afternoon to prevent leaf scorch.
Tracking root growth without damaging new shoots is easier than you think. Gently lift the orchid from its pot every 2 weeks to inspect roots. Healthy new roots should feel firm and plump, while mushy or blackened roots signal overwatering. Use a magnifying glass to spot tiny root hairs—these are the first sign of regrowth, often visible 1-2 weeks before roots thicken.
One common mistake? Assuming all orchids follow the same timeline. Your Oncidium might show roots in 5 weeks, while a Paphiopedilum (lady slipper) could take 10-12 weeks. Always check the species-specific care guide—light, water, and temperature needs vary wildly. For example, Paphiopedilums need shadier conditions and higher humidity (70-80%) to encourage root growth.
If your orchid hasn’t sprouted roots after 3 months, don’t panic—it might be entering a natural dormancy phase. Reduce watering by half and move it to a cooler spot (60-65°F) for 4-6 weeks. Many orchids, like Cymbidiums, need this rest period before new roots appear. Think of it as their way of recharging before the next growth cycle.
Ready to speed up the process? The next section reveals 5 science-backed care triggers that can cut root regrowth time by 30-50%—without chemicals or gimmicks. We’ll cover everything from light spectrum hacks to substrate swaps that make
5 Key care triggers that accelerate orchid root growth (without chemicals)
Orchid roots grow fastest when you mimic their natural jungle habitat—humidity levels above 50%, bright indirect light, and short dry spells between waterings. Most growers overlook these triggers, leading to roots that grow at a snail’s pace or worse, rot before they even start. I’ve tested these conditions with my Phalaenopsis and Cattleya orchids, and the results speak for themselves: roots appear in half the time when you nail these five factors.
The first trigger is light exposure. Orchids need 10-14 hours of bright, indirect light daily—think east or west-facing windows, not harsh afternoon sun. Place your orchid 2-3 feet from the window, and watch for silver-green roots (a sign of healthy photosynthesis). Too little light? Roots stay dormant. Too much? They burn before they grow.
Here’s how to optimize each trigger for faster root growth—without resorting to chemical root boosters:
- 💡 Light: 10-14 hrs bright indirect light (east/west windows). Fix: Rotate pot weekly for even growth.
- 💧 Watering: Soak-and-dry method (1x/week). Fix: Use room-temp water; avoid cold taps.
- 🌡️ Temperature: 65-80°F days, 55-65°F nights. Fix: Avoid drafts near AC/heaters.
- 🌬️ Humidity: 50-70%. Fix: Use a pebble tray or humidifier near the plant.
- 🪴 Substrate: Bark/chip mix (never soil!). Fix: Repot every 1-2 years with fresh orchid mix.
Let’s tackle the most common mistake first: watering on a schedule. Orchids hate soggy roots—overwatering is the #1 killer of new root growth. Instead, use the soak-and-dry method: Submerge the pot in room-temperature water for 10-15 minutes, then drain completely. Repeat every 7-10 days, adjusting for humidity. Pro tip: Check root color—silver-green roots are thirsty; green roots are hydrated.
Temperature swings also stall growth. Orchids thrive in diurnal temperature fluctuations (warmer days, cooler nights). Keep daytime temps between 65-80°F and nights 55-65°F. Avoid placing your orchid near heaters, AC vents, or drafty windows—these create stress that halts root development. A simple digital thermometer near your orchid will help you monitor these conditions effortlessly.
Finally, humidity is the secret weapon most growers ignore. Aim for 50-70% humidity—any lower, and roots dry out before they grow. Use a pebble tray (fill a tray with pebbles and water, place pot on top) or a small humidifier near your orchid. For Cattleyas and Dendrobiums, slightly higher humidity (60-70%) speeds up root growth by 30% compared to dry air.
Combine these triggers, and you’ll see new roots in as little as 4-6 weeks—even with slow-growing varieties. The key is consistency: adjust one factor at a time and observe how your orchid responds. Within a month, you’ll spot those first tiny white root tips emerging like magic.